Proper roof ventilation isn’t just about air movement—it’s key to keeping your home dry, comfortable, and energy-efficient. Yet it’s something many homeowners don’t think about until problems start to show, like condensation in the attic or rising energy bills. If you’re looking to install new vents or upgrade an older system, a common question is how long the job will actually take.
The short answer? It depends. The time needed to install roof vents can vary based on the type of vent, the size and shape of your roof, and whether the work is being handled by a professional or done yourself. In this guide, we’ll walk you through the main factors that affect installation time, explain what each type of vent involves, and help you plan your project with confidence.
Why Roof Ventilation Matters
Before diving into timeframes, it’s helpful to understand why roof ventilation is worth your attention. Ventilation in the attic or roof cavity helps control temperature and humidity levels. Without it, hot air gets trapped in summer, leading to higher cooling costs and potential damage to roofing materials. In cooler months, poor ventilation allows moisture to build up, which can result in mould, rot, and insulation degradation.
Key benefits of proper roof ventilation:
- Temperature regulation: Keeps your home cooler in summer and reduces pressure on air conditioning systems.
- Moisture control: Helps prevent condensation that can damage roof materials and cause mould growth.
- Extended roof lifespan: Reduces the risk of shingle damage and material fatigue caused by temperature extremes.
- Energy efficiency: A balanced ventilation system supports better thermal control, potentially lowering energy bills.
- Improved indoor air quality: Keeps air moving in the attic and roof space, which can help remove stale or damp air.
Different Types of Roof Vents and Their Installation Times
There’s no one-size-fits-all approach to roof ventilation. The type of vent best suited to your property depends on the structure of the roof, the local climate, and the existing ventilation setup.
Below, we explore the most common types of roof vents, what they do, and how long they typically take to install.
Ridge Vents
Purpose: These are installed at the peak of a sloped roof. Ridge vents allow warm, humid air to escape from the attic while pulling in fresh air from intake vents (usually soffit vents). They are discreet and provide continuous ventilation.
Installation time: 3 to 6 hours for an average-sized home.
Factors that affect the timing include the condition of the ridge, the roof pitch, and the overall roof size. Homes with multiple ridges or steeper roofs may take longer.
Soffit Vents
Purpose: Located under the eaves, soffit vents serve as intake vents, letting cooler outside air enter the attic to replace the hot air that escapes through ridge or gable vents.
Installation time: 1 to 3 hours for most homes.
This timeframe may increase if the existing soffit is damaged or blocked, or if new vents need to be cut into solid panels.
Gable Vents
Purpose: Installed on the gable ends of the attic wall, these vents provide a way for hot air to escape from the highest point of the attic. Often used in older homes or in conjunction with other ventilation systems.
Installation time: 2 to 4 hours.
Time varies depending on the material being cut through (e.g., timber, brick, or siding) and whether internal framing adjustments are needed.
Roof Turbine Vents
Purpose: Also called whirlybirds, these vents use wind power to spin a turbine, drawing hot air from the attic. They work best in windy regions.
Installation time: 2 to 3 hours per vent.
Each turbine requires a hole to be cut in the roof, flashing to be installed, and shingles replaced or repaired around the opening.
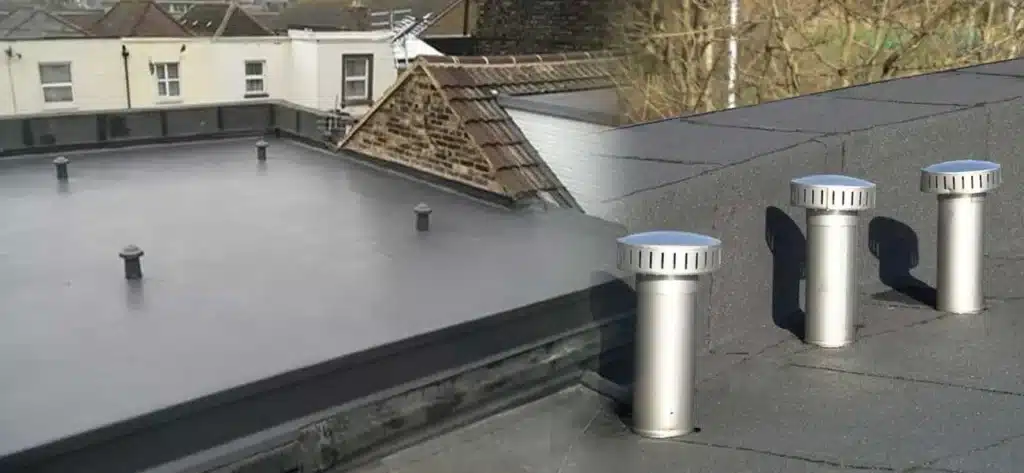
Powered and Solar Roof Vents
Purpose: These are active systems, typically motorised or solar-powered, that forcibly extract hot air from the attic. They’re especially useful in larger homes or areas with minimal airflow.
Installation time: 4 to 6 hours per unit.
These vents often require electrical wiring, roofing modifications, and sometimes attic access. Solar units don’t require wiring but still need careful placement for optimal exposure.
Factors That Influence Installation Time
While average times are helpful, actual installation can be quicker or slower depending on several variables.
Roof Size and Complexity
Larger roofs or those with multiple sections, dormers, or peaks can increase installation time. A flat or simple gable roof is far quicker to work on than a steep multi-level design.
Material of the Roof
Metal, tile, and asphalt shingles all require different tools and techniques. Tile and metal roofs usually take longer because they require more precision and may need additional flashing to ensure waterproofing.
Accessibility
Is the roof easy to reach? If scaffolding or additional safety equipment is needed, setup and teardown will add to the total time.
Condition of the Roof
If the roofing material is damaged or the underlayment has rotted, repairs will need to be made before vents can be installed. This can add hours to the job or delay it entirely.
Number of Vents
Installing multiple vents? Expect the total job to take longer. However, many professionals work efficiently and may install multiple units in a single session, reducing overall labour costs.
Professional vs DIY Installation
You might be wondering if you can install roof vents yourself. While some handy homeowners tackle this job on their own, it’s important to weigh the pros and cons.
DIY Installation
Pros:
- Cost savings on labour
- Flexible scheduling
Cons:
- Risk of roof leaks if installation isn’t airtight
- Working at height can be dangerous
- May take much longer than professional work
- Could void roofing warranties or cause insurance issues
Estimated time: 1 to 2 days for a standard project (vs 3 to 6 hours by a pro)
Professional Installation
Pros:
- Faster, safer, and often comes with a workmanship warranty
- Knowledge of building codes and best practices
- Proper tools and materials
- Less chance of long-term issues
Cons:
- Higher upfront cost
If speed, safety, and quality are priorities, hiring a qualified roofer is usually the better option.
Roof Vent Installation Step-by-Step
Here’s a simplified version of what a roof vent installation typically involves when handled by professionals:
- Initial inspection: The contractor checks existing ventilation, measures the attic space, and identifies hot spots.
- Vent selection: Based on the property’s size and layout, they choose the appropriate type and number of vents.
- Roof preparation: Shingles or tiles in the installation area are removed. The roofing membrane is checked for damage.
- Cutting the opening: The exact shape and size are cut using power tools. This is where safety and precision matter most.
- Flashing and sealing: To prevent leaks, vents are flashed and sealed with waterproof materials.
- Installing the vent: Vents are fastened securely to the roof, ensuring they’re aligned and level.
- Replacing roof covering: Shingles or tiles are replaced and resealed around the vent to blend with the roof.
- Final inspection: The team checks airflow, seals, and ensures the system is ready to perform efficiently.
How Long Will the Whole Project Take?
Here’s a practical estimate based on real-world jobs:
| Property Type | Vents Installed | Estimated Time |
| Small single-storey | 2 soffit vents + 1 ridge vent | 3–4 hours |
| Standard family home | Ridge + soffit + gable vents | 5–8 hours |
| Large or complex roof | Multiple powered or turbine vents | 1 full day (6–10 hrs) |
| Flat roof conversion | 2 solar-powered vents | 4–6 hours |
What Can Delay Roof Vent Installation?
Even a well-planned installation can run into issues. Here are some of the common delays:
- Weather: Rain, strong wind, or extreme heat can halt work.
- Unexpected damage: Rotted roof decking or hidden mould may need fixing first.
- Access problems: Overgrown landscaping, blocked paths, or steep driveways can slow down equipment setup.
- Permit requirements: In some areas, roof modifications require pre-approval or post-work inspection.
- Incorrect vent type selection: Choosing the wrong type may result in a second visit to swap out materials.
Maintenance and Aftercare
Once the vents are in place, it’s wise to check them regularly—at least once a year. Here’s what to look out for:
- Cracked or missing sealant
- Debris like leaves or nests blocking intake/exhaust
- Signs of moisture or condensation in the attic
- Loose fastenings or displaced vent covers
A quick visual check, especially after storms or harsh weather, can help catch small issues before they become big problems.
Conclusion
So, how long does it take to install roof vents? For most homes, the job can be completed in three to six hours, depending on the number and type of vents being installed. Complex installations or those requiring multiple vent types may stretch into a full day.
Whether you’re adding vents as part of a roof upgrade, tackling attic condensation, or preparing for an insulation grant, knowing what to expect helps you plan more effectively. Always consult a reputable contractor for an inspection and quote tailored to your property.Weathersafe Roofing is the trusted choice for homeowners across Dublin and Navan who want lasting solutions, not just temporary fixes. With a reputation for solving complex roofing problems that others can’t, our team offers professional service, written guarantees, and exceptional craftsmanship. Contact us today for a free quotation and expert advice tailored to your home’s needs.